Happy Tuesday! Jennifer here with an organizational tip for you. I am a stickler for having my files organized on my computer. Nothing irritates me like knowing I have a great kit, photo, template, etc and not knowing where or how to find it. Today I’m going to share with you a tip I have for organizing your templates.
When I sit down to scrap a page, the first thing I do is go through my photos and decide which ones are going to be used on that page. When I’m done, I have a pretty good idea of how many photos I have to use. So let’s say for the page I’m going to do today, I have 5 photos. If I want to use a template, how on earth am I going to find a template with 5 photo openings without spending half an hour searching through my files??
Easy peasy!! Whenever I download a new template set, I copy the preview image into another folder I call Template Previews.
For PC users:

Then, I open the image and tag it with the number of photo openings on each template, ie 2 photos, 3 photos, etc.
For PC users:

For MAC users:
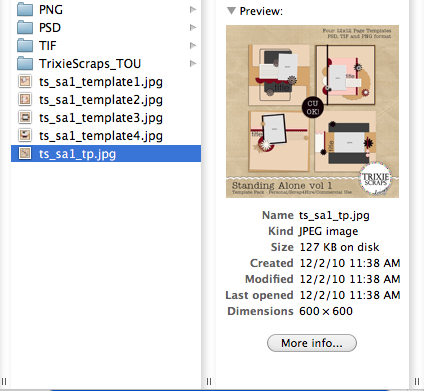
In Finder, on the preview, click the More Info button.

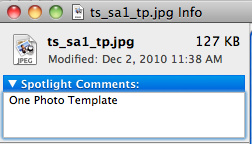
This will open a new window that will allow you to add keywords to the Spotlight Search box.

Now, when I need a template that has 5 photo openings, on my PC I open my Template Preview folder and either search for “5 photos” (note the double quotation marks) or by the Tags header.

MAC users just type the keywords into the spotlight search and your keyworded files will appear.
I can scroll thru my options, decide on the one I want and go to that set to grab my template. Now, I can get to work creating instead of spending time digging through file after file.

I used The Great Divide vol 1 template set and the Fishy Friends kit.
I hope that tip saves you some time and helps you get your templates organized! And don’t forget to check out the incredible selection of templates by Trixie Scraps!

All Trixie Scraps Designs products can be found in the following online stores:
Trixie Scraps Shop * My Memories * Gotta Pixel * Scrapbook Bytes * Funky Playground


Any ideas on how to do this with Windows 7? All I have is Windows Photo Viewer, which looks similar to the Picture Gallery, but I can’t seem to see where I can tag the image.
Found more details from the Windows site: ‘Looking for Windows Photo Gallery? It’s not included in Windows 7. You can view and print your photos with Windows Photo Viewer. To edit them, you’ll need to install Windows Live Photo Gallery or a program from another company.’
I guess I’m going back to my Lightroom. I like it, it’s just a lot of work tagging the images, when I have so many. Your way seemed a lot easier.
Dani – I have Windows 7 on my work PC and I can do it right from Windows Explorer. Go to the Start menu, Documents and find the folder with your templates. Click on the preview image (will only work on a jpg) and on the bottom of the screen you should see the ‘Tags: Add a tag’ option. Type in your info, click Save and you’re done!