Hello Trixie Scraps blog readers 🙂
A pleasure to meet you, my name is Amanda. I am a newbie CT member and this is my first post, I hope you will find helpful.
We all have pictures we take and share with family and friends online, even ones we don’t scrap 😉
I often get asked, how to add a logo, stamp or watermark to an image…we need to protect our images, brand them, copyright them, add your identity to them.
SO, I thought that I could share my technique with you.
I am showing how to attach the watermark to your digital photographs using Paint Shop Pro, it will work in Photo shop as well.
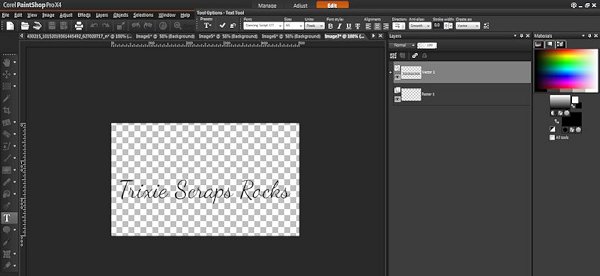
If you do not have a watermark with your name on it or a symbol that represents you 😉 here is how I created one.
Image, New Image, with a transparent background.
The size is up to you, I would personally rather to be able to decrease the size than enlarge it, so my suggestion would be to go aprox 75-80% of your image.
Choose your text, font color – I have done both black and white text versions, depending on your image, it may be easier to blend.
Type your text.
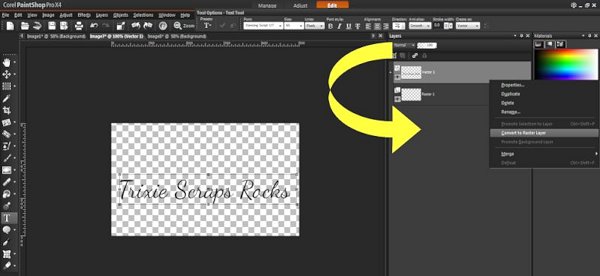
Once you are done that, go to your layers palette and convert to raster.
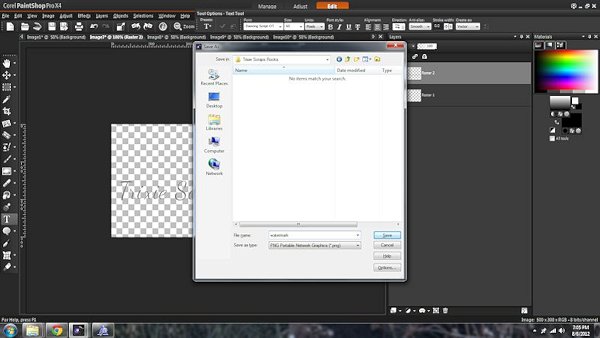
Then save the image so that you can use it on all of your photographs.
Save it as .png so that the background is transparent.
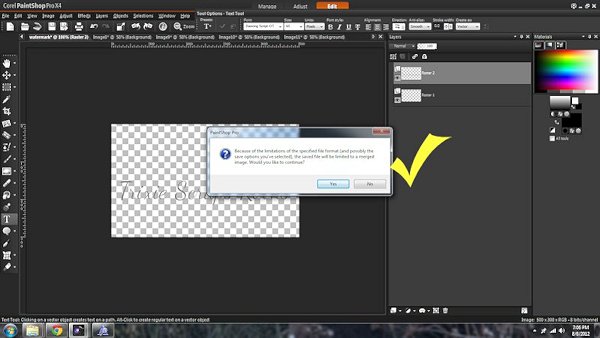
It may tell you that it has to save the image as merged. YES please 🙂
To attach your watermark to your image.
Open your photograph, open your water mark.
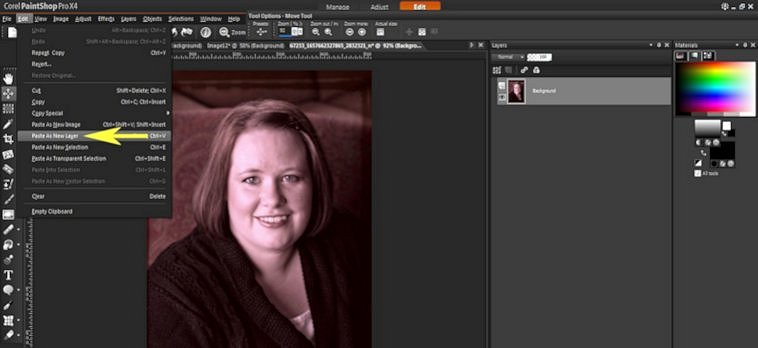
Go to edit,
Copy,
Click on your photograph, to make it active,
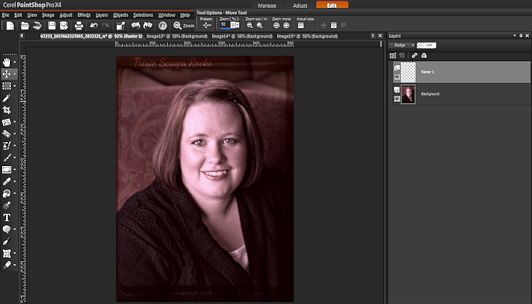
Edit & Paste as a new layer.
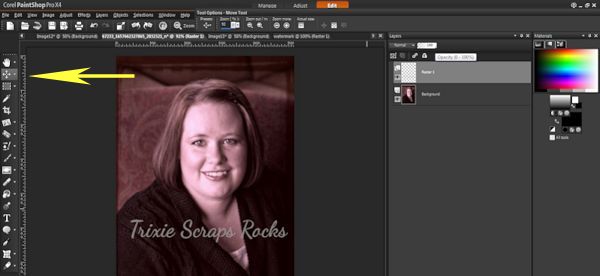
Now you can use your mover tool to position where you would like your watermark to be located on your image
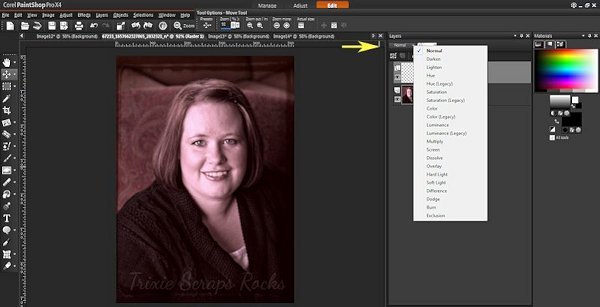
There are different ways to blend your watermark into your image, so it is not as prominent, it really is a personal preference and also will depend on the image, obviously blending black on a dark part of the image will be harder.
You can use the blending tools as well, selecting different options to see which one you like best
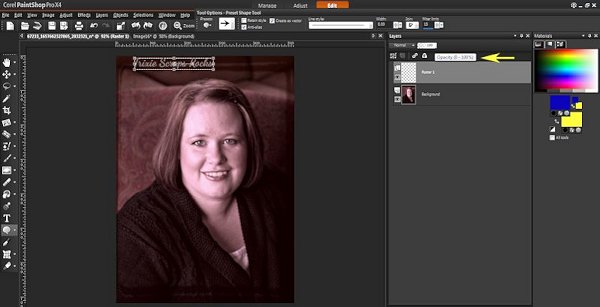
You may also lower the opacity of your watermark, this will make it more transparent as well.
Once you are done, save 🙂 (yes to merged)
I hope you enjoyed this little tutorial and it helps you protect your photographs & scrapbooking pages.

All Trixie Scraps Designs products can be found in the following online stores:
Trixie Scraps Shop * My Memories * Gotta Pixel * Scrapbook Bytes


thanks so much for this tut, I’ve alway wondered the best way to do this. What does it mean to raster? Could you just save as a png and get the same effect. thanks again 🙂