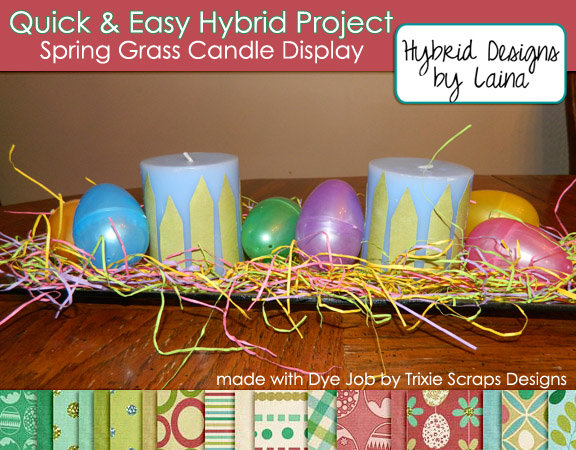
Happy Monday everyone! I’m here today with another Master’s Monday {Hybrid Edition}. It will be March in a few days and to me, that means spring time is nearly here! So, I don’t know about you but I’m just itching to get started with my Spring décor. I created this simple Spring display in three basic steps.
To make this display, you’ll need:
Spring papers from your kit of choice
A paper shredder
Plastic Eggs
Plain Pillar Candles
Mod Podge
Tray for displaying
For this project, I used Dye Job by Trixie Scraps Designs.

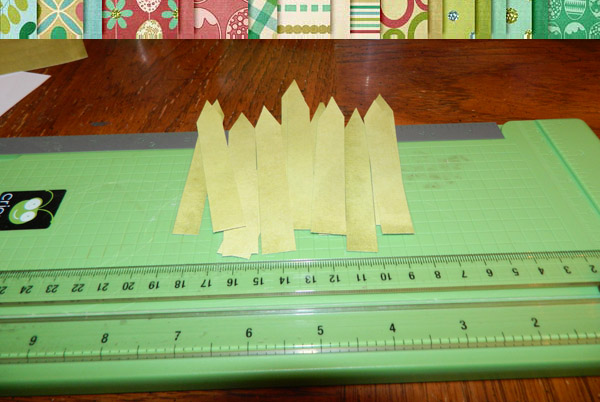
1. First I printed out my choice of green paper in the kit on a 8.5×11 sheet of paper. Then after printing, I trimmed the white edges off and started to measure out my blades of grass. I cut out thin strips with my cutting board and then created the triangular tip with my scissors.
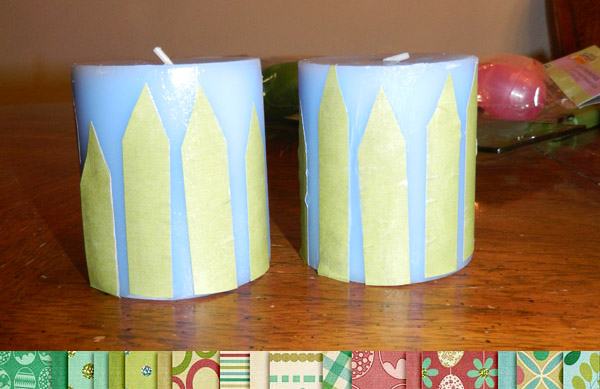
2. Now to glue them on the candle. I choose a blue candle, but white would work fine too. Using a thin layer of modpodge, I glued one blade at a time, and worked my way around the candle unless it was finished. Then I repeated this step on the second candle.
3. To make the paper grass, I first printed out various colors onto their own 8.5×11 sheets of paper. Then, like in step one, I trimmed the white edges off with my cutting board. Finally, I shred the paper through my machine and crumbled them up various times to get the look I wanted. To finalize my display, I added plastic eggs in various colors. Later, when we do our egg dying, I’m sure I’ll replace the plastic eggs with our family’s beautifully, uniquely decorated creations.

All Trixie Scraps Designs products can be found in the following online stores:
Trixie Scraps Shop * My Memories * Gotta Pixel * Scrapbook Bytes


