Hi again, Trixie Scrappers. I enjoyed the last Masters Monday tutorial – photo editing, rather than digital scrapbooking – so much that I decided to bring you another one. This time I’m going to show you one way of getting rid of those nasty “green-eyed” pets we all have in our photo shoeboxes. Red eye removal is simple in PSE, if your camera doesn’t already correct or prevent them, but pets’ eyes are different and there’s no way to get rid of that eerie green glow. Let’s talk science for a second. Red eyes show up on flash photos of humans because the ambient light around the person is low, causing their pupils to dilate to let in as much light as possible. When the flash goes off, pupils can’t constrict fast enough to prevent the flash from bouncing off the retinas at the back of each eye. This is called the red or light reflex. Human retinas contain two types of cells, rods and cones. Rods are responsible for receiving and translating black, white and grey vision. Cones are the colour vision cells and they’re the ones we see as red in flash photos. Animals don’t have cones, only rods. So when the flash hits their retinas it’s reflected back as greenish or yellowish. Makes sense? Now let’s talk about how to get rid of it!
There are a few ways you can do this, but the one I’m going to show you is the most versatile. If your pet is head-on to the camera, both eyes will have that spooky green look to them. If their head is turned slightly only one eye might be green. So you could just select and copy the ‘normal’ eye then paste it over the abnormal eye. The problem with this technique is that you’ll have to flip the copy, and it might be impossible to get it exactly right because the shape of it isn’t exactly the same as the other. The method I’m going to show you is fairly simple, although a glimpse at the number of screenshots I’ve got might suggest otherwise. I like to show every step in detail, that’s all.
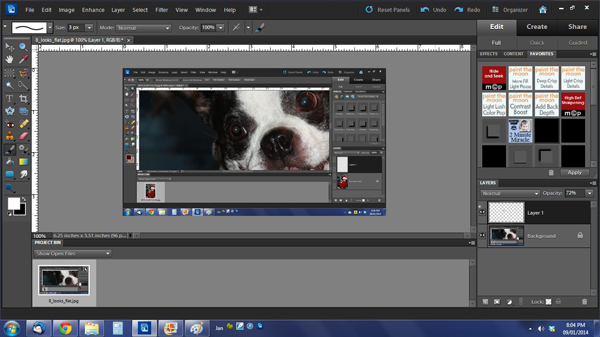
So let’s go! Open up a photo of a green-eyed monster on your workspace and zoom in a LOT. Everybody, meet Lucy!
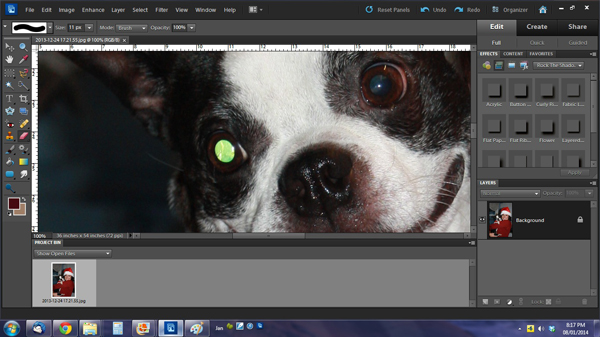
Zoom in some more, then select your “Quick Selection” tool – the one that looks like a wand with a dashed-lined rectangle next to it. (Keyboard shortcut Ctrl/Command A) Click and drag until you’ve selected the entire pupil area of your photo as shown in the screenshot. (If you are fixing both eyes, hold down the Shift key while you click-and-drag to select the second pupil. Then you can correct them both at the same time.)
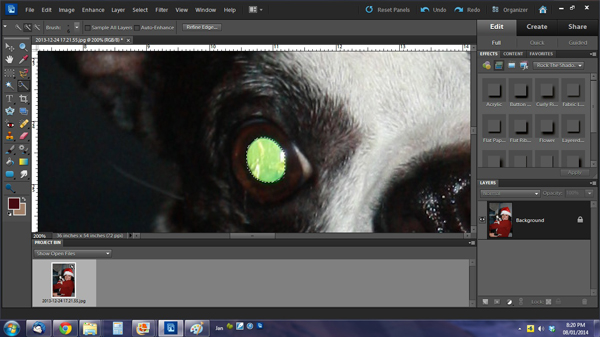
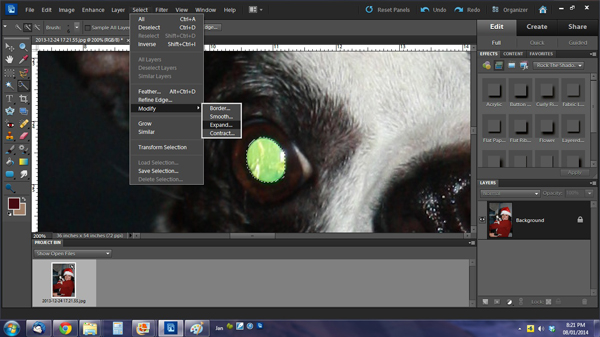
From experience I know that this selection isn’t going to capture ALL of the green; you really don’t want a green ring outlining your pet’s pupil – it’s UGLY. So the next step is to click on Select]Modify]Expand as shown and expand your selection by 2 or 3 pixels.
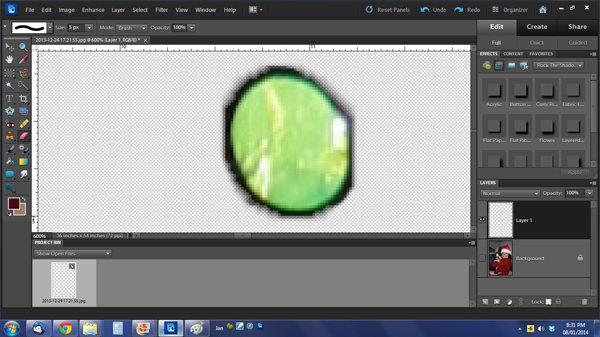
Duplicate your layer: Ctrl/Command J or by right clicking on the layer and selecting Duplicate Layer. Turn off the background layer of your photo by clicking on the eyeball to the left of the layer in the Layers palette. Make sure you’ve highlighted the duplicate layer in the Layers palette. Now you’ll see a green blob with a black or brown ring around it. If it looks a little angular, you can use your Eraser tool to smooth the edges just a wee bit, but don’t get carried away.
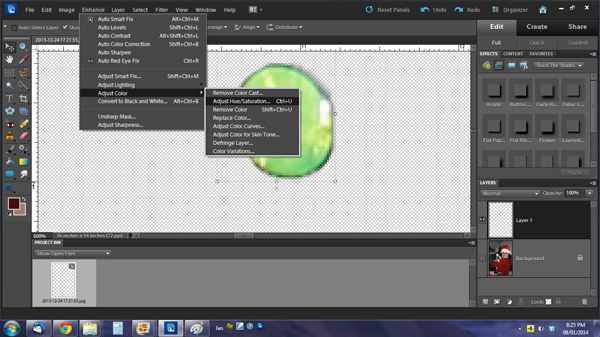
This is the layer you’re going to work on so make sure it’s the layer that’s highlighted in your layers palette. Click on Enhance]Adjust Color]Adjust Hue/Saturation (keyboard shortcut Ctrl/Command U) and drag the Saturation slider all the way to the left. Now the pupil will be grey. Next drag the Lightness slider to the left until your pupil is almost black.
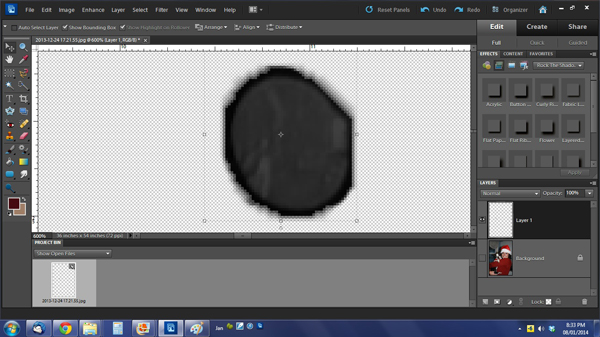
If it still doesn’t look right, turn on your background layer again by opening the eyeball and zoom out a bit so you can see the other eye. Go back into Enhance]Adjust Color]Adjust Hue/Saturation and drag the Lightness slider to the left some more until the eye you’re working on looks more like the ‘normal’ one. (Obviously if you’re doing both eyes, it’s all up to you to decide when it looks right.)
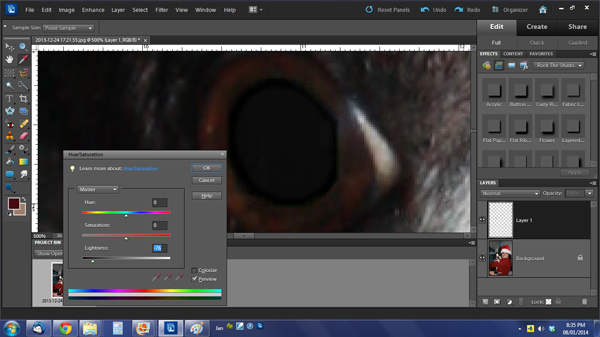
When you look at your edited eye, you’ll notice that it looks pretty flat and lifeless.
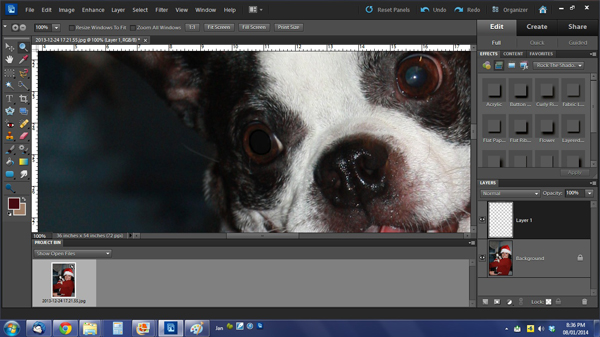
You can now go to the ‘normal’ eye and copy the glossy part and the catchlight (that white dot that gives the eye its life). [If you don’t have a ‘normal’ eye to work with, there’s another step coming to help you out – so you can go get a beverage, or take a BR break or whatever.] To copy the glossy part, again go to your Quick Selection tool, click and drag to select that area of the ‘normal’ eye then click Ctrl/Command C to copy it. Then click Ctrl/Command V to paste it onto your photo. You should have three layers in your Layers palette now and you’re working on your topmost layer, or Layer 3. Use your Move tool to take the copy to the flat eye and position it. You may have to rotate it a smidge to get it to look right.
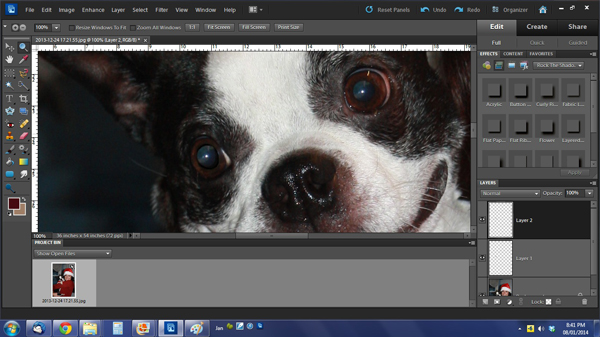
You might find that the edited eye still looks unnatural, so on Layer 3, decrease the opacity as shown until it looks more like the ‘normal’ eye.

And BINGO! The green-eyed monster is gone! Merge all your layers (highlight them all then click Ctrl/Command E) and save your edited photo. See, it wasn’t nearly as hard or involved as you thought. UNLESS you didn’t have a ‘normal’ eye to work with. For all of you, let’s figure out a workaround. For the rest of you, you can start creating a layout around your pet’s photo now.
WORKAROUND: On Layer 2, the flat-looking pupil layer, you’re going to use a filter. Duplicate the layer so you can adjust only this layer later. Click on Filter]Artistic]Plastic Wrap. Your filter menu will look like this. Move the sliders to approximately those shown for the best effect. (Highlight Strength 4, Detail 8 and Smoothness 15)
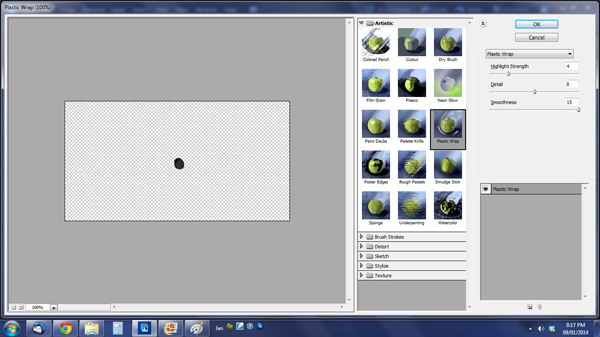
After you’ve put your filter on the pupil, use your Move tool to adjust the size and position of your new pupil. You don’t want the whole pupil to be plastic, so play with it until it looks good to you. You could also skew the pupil, but that’s a tut for another day…
To imitate a catchlight use a small, hard round brush and white (color “ffffff”) to paint one on. Figure out where the light source is coming from, maybe by looking at catchlights in the human eyes in your photo, if there are any, or by looking at how the shadows fall. Then paint on your little white dots. Zoom out to see how it looks and play with it until it looks right. You might have to undo and redo a few times until it looks good, but be patient, it will work. If you look REALLY closely at this screenshot you can easily see the difference in the two eyes, but no one is going to look that closely!
And there you have it! A relatively quick, easy and painless way to remove that sickly green glow from your pet’s eyes. As with all of my MM tuts, once you’ve done this a couple of times, you’ll have no trouble remembering how to do it. (Didja notice I’m gradually training you to use keyboard shortcuts? They really do streamline work flow!)
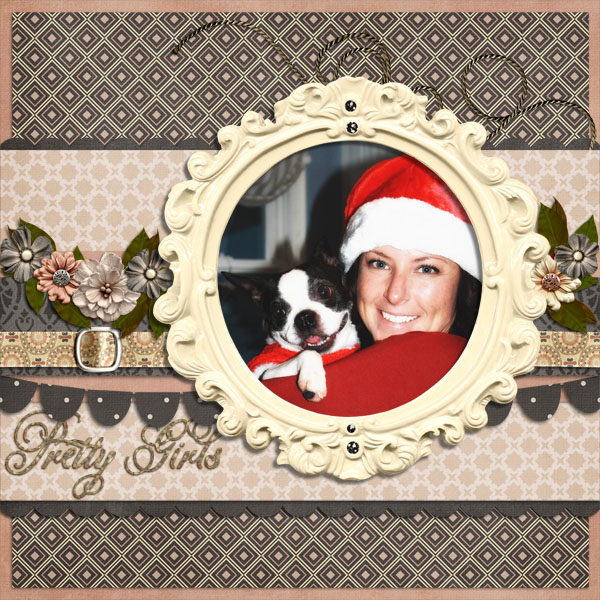
Want to see my edited photo in a layout?? Here it is! I used Trixie’s kit God Gave Me You, some string from a Trixie retired minikit and a template designed by Lissykay.
~Jan

All Trixie Scraps Designs products can be found in the following online stores:
Trixie Scraps Shop * My Memories * Gotta Pixel * Ginger Scraps


