I’m back today to bring you another quick little tutorial on one way to color correct your photos. This is a real quick trick and sometimes it’s all you need to do to bring life back into a photo. Othertimes, you’ll have to use this trick in conjunction with other tricks – but you’ll still get the most out of your photos. So today we’re going to show you how to color correct your photos using levels.

My mother in law likes to get photos of my family all dressed up just before Christmas. We don’t hire a photographer as my mother in law also likes to take pictures. A couple of years ago we were blessed with wonderful weather, the sun shining and everything that makes for good outdoor photos. Well, some of the photos came out a little too bright and some came out too dark. For awhile I thought they were lost causes, but then I discovered that by playing with levels, not all is lost.
So here’s a look at the photos that were a little too bleached and/or dark.
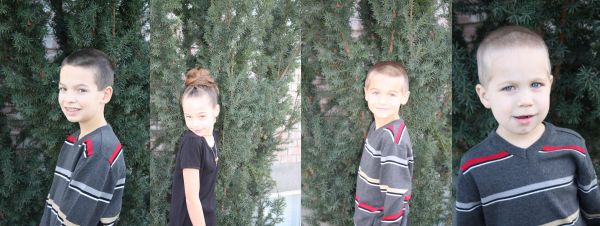
The photos on each end were just a little too dark for my liking and the skin tone just didn’t seem right. Obviously, the two photos in the middle had too much light. So we play with levels and we fix them.
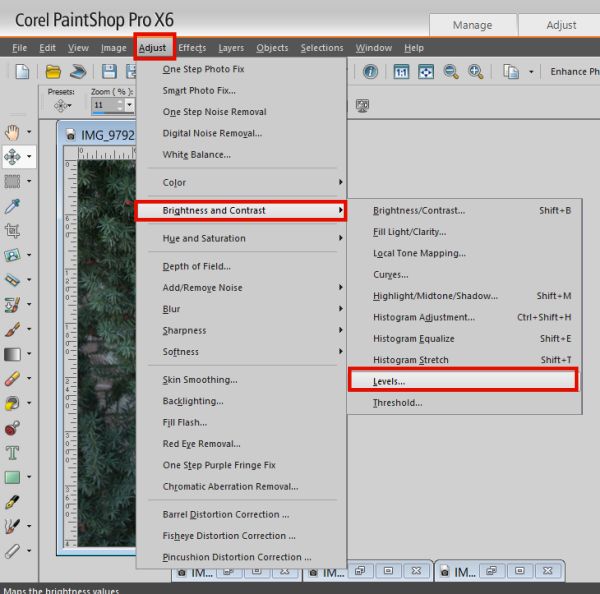
We start by going to ADJUST in our toolbar. From there we’ll click on BRIGHTNESS AND CONTRAST and then LEVELS.
This brings up the LEVELS options. If you’re super talented you can play with the options on the right hand side of the box, but if you’re like me and like to do things the easiest way possible, just play around with the sliders on the left. If you have the option of PREVIEW ON IMAGE checked, it’ll help you see what the result will be.
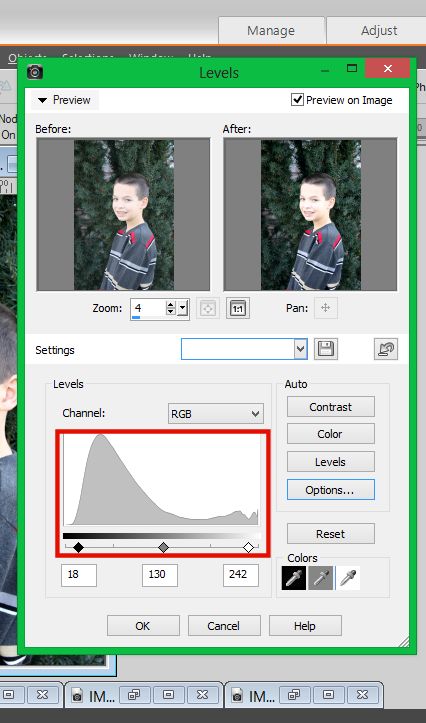
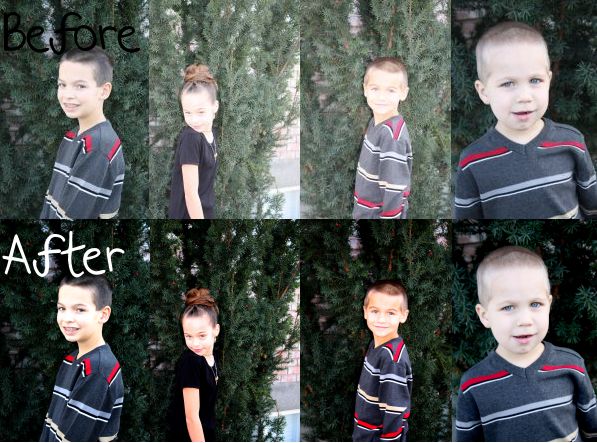
After playing with the levels (adding more darkness to the bleached photos and more light to the darkened photos), I got this.

Much brighter looking photos and something I am much more apt to use in my layouts. Here’s a quick comparison of before and after.
So take a look around your photos and see what photos you can maybe save just by using levels.
 All Trixie Scraps Designs products can be found in the following online stores:
Trixie Scraps Shop * My Memories * Ginger Scraps


