I used to be a bad cropper, and I admit, at times I still am. I would just crop down the image to what I really wanted in the picture and I didn’t think much about it. Until I tried printing it off and then I had major issues. It just wouldn’t print right. It was either too small or too big and what it did print was at odd angles. Then I discovered how to keep the aspect ratio when you crop a photo.
With Easter coming up I thought I’d work with pictures from Easter a few years ago. My mother-in-law loves getting pictures and had the idea to just take them herself. Somehow she came up with a painted background and we went to work. Well you’ll see that our pictures are obviously less than professional.
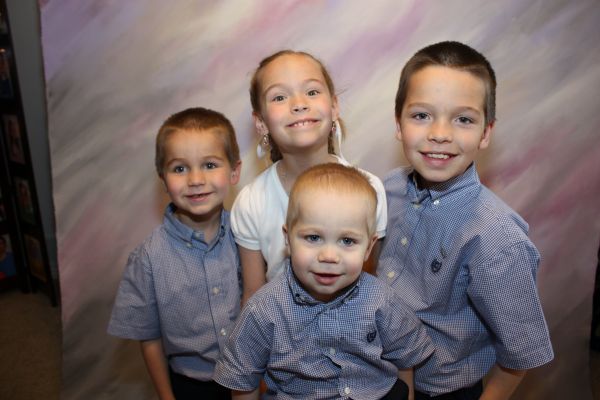
So let’s fix this image so that all we have is the kids and none of the background noise that’s going on.
After you open your picture, click on your CROP tool. From there right click on your photo. It should bring up a window like in the below picture and make sure RULE OF THIRDS is checked.
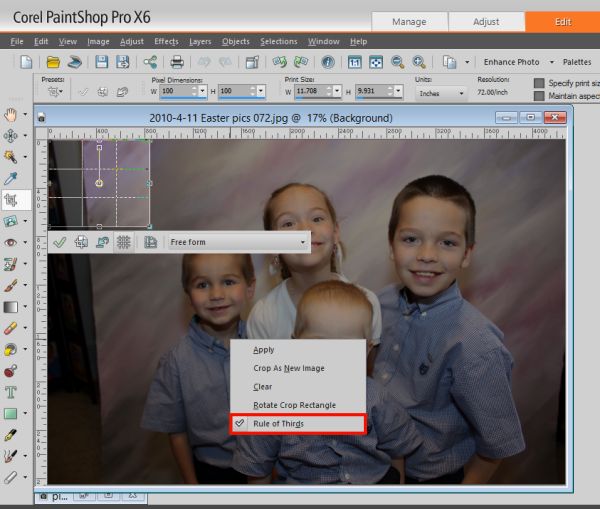
When you have RULE OF THIRDS all set up, we are ready to go.
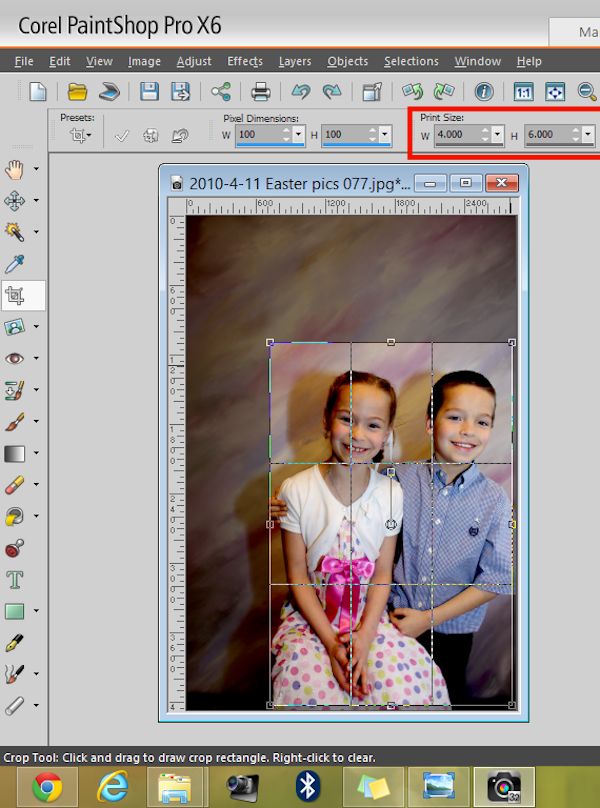
You should already be working with the CROP tool, so go ahead and look at the option bar towards the top of your screen.

It’s hard to see in the photo above, but we’re going to be working with PRINT SIZE and you also want to make sure you check SPECIFY PRINT SIZE which will automatically tick the MAINTAIN ASPECT RATIO option.
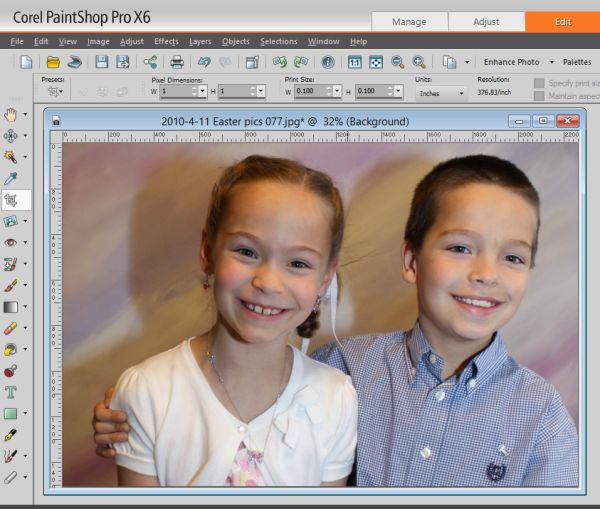
So then we’ll enter the print size we want to work with. For this tutorial I am working with a 4×6 option. So I made sure those were the dimensions I entered and made sure I had SPECIFY PRINT SIZE checked. Then no matter how I moved my crop rectangle it stayed in a 4×6 ratio.
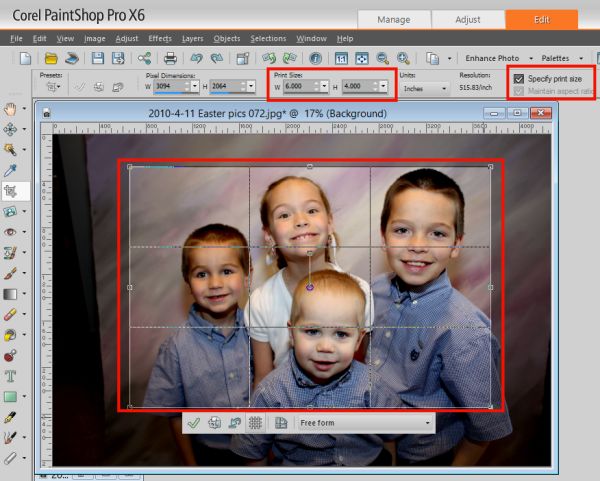
I put my crop square where I wanted in my photo and made sure I dragged the edges to make sure I had the area I wanted and then cropped it.

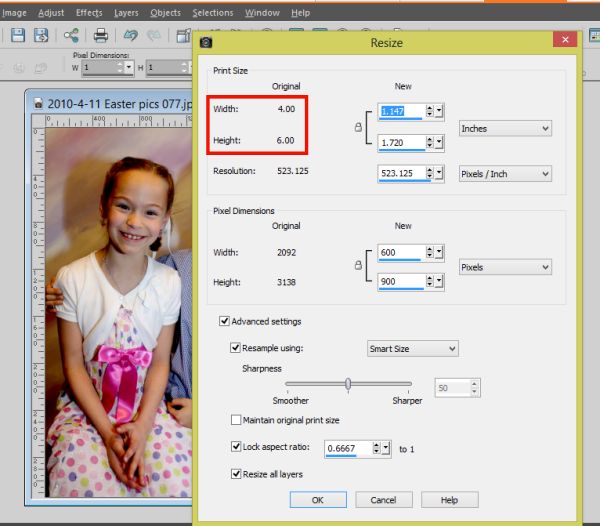
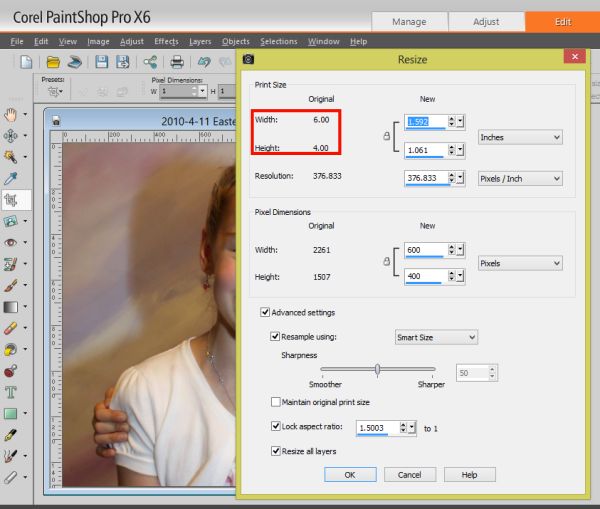
Suddenly, I have a picture with the important things in it and none of the fluff. And to make sure it stayed true to a 4×6 size, I went into the RESIZE option on my main tool bar and when the window opened, I made sure it was still 4×6.
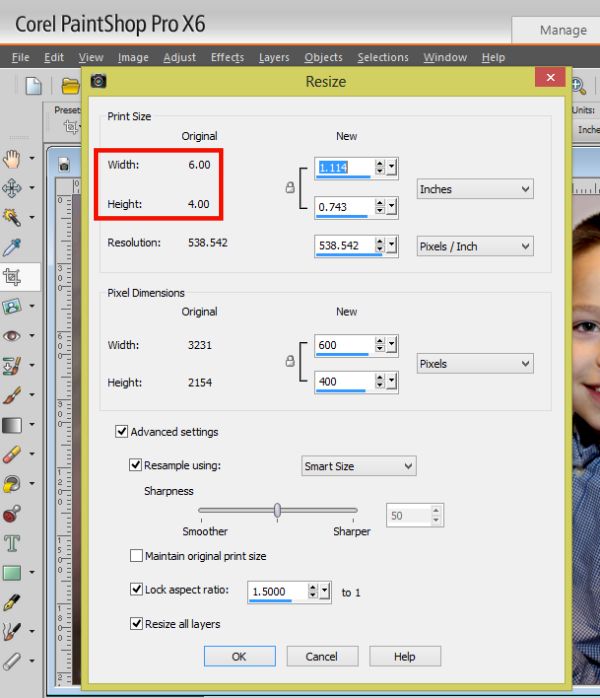
So that one was easy, but what if you have a photo that can be cropped either way. Well, let me show you.
Here’s our original.
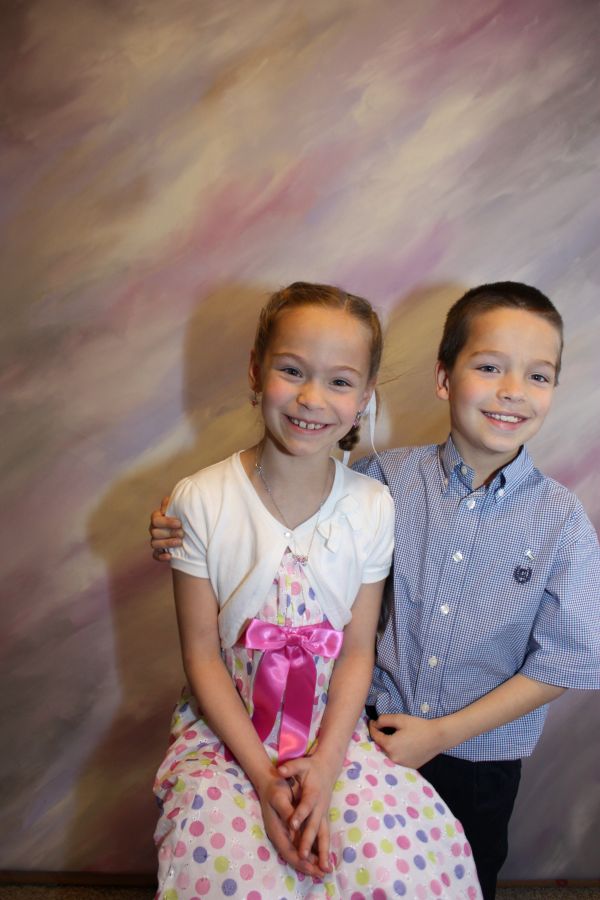
We follow the same steps as above and enter the 4×6 size in the OPTIONS still making sure our SPECIFY PRINT SIZE is checked.
We end up with this image.
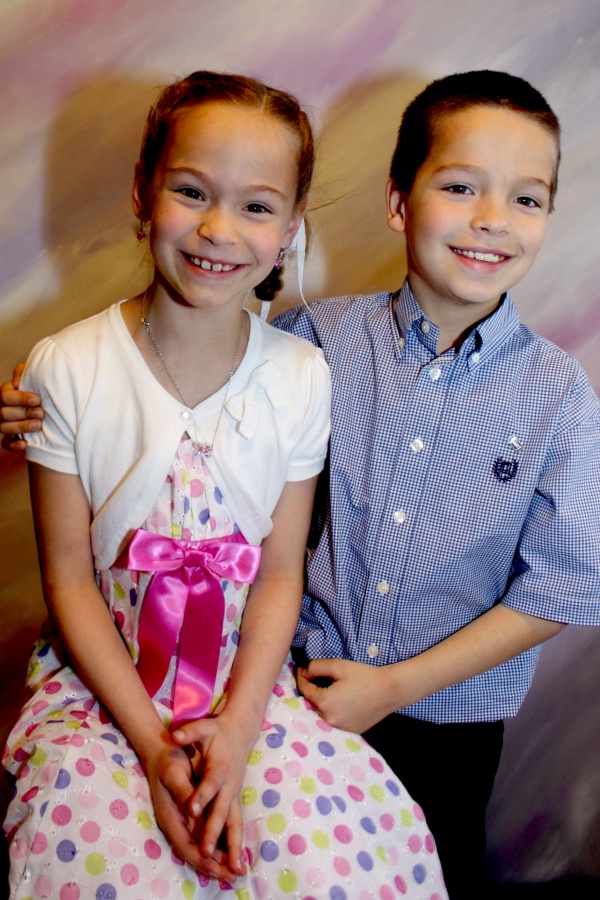
I double checked myself again by looking into the RESIZE menu and sure enough it is still 4×6.
What if you want to change the direction of the photo from horizontal to vertical. This is easy. Again we start with our CROP tool. But now we will right click on our image and we should get a little menu popup. We want to select ROTATE CROP RECTANGLE.
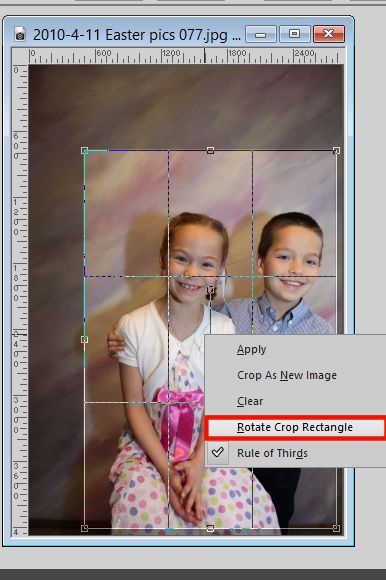
See our rectangle is rotated.
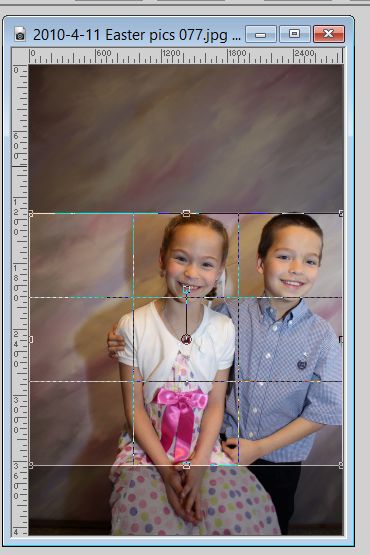
We do everything as before. Moving our rectangle to the part of the photo we really want.
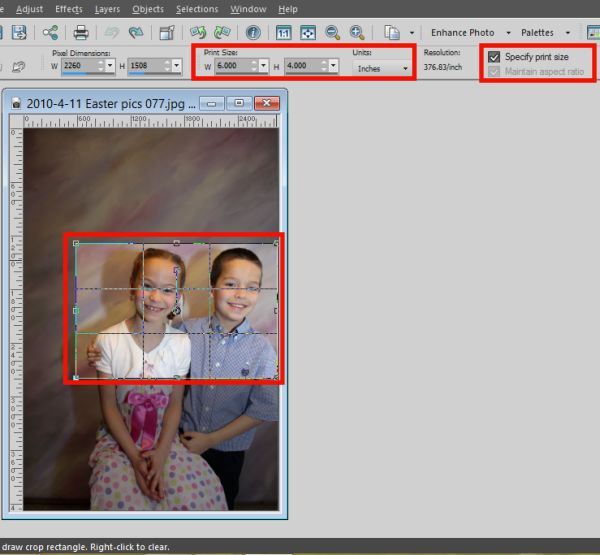
And then, tada!
Then always double check your work before printing or working with the photo.
Making sure you keep the aspect ratio when you crop your photos will save you a lot of heartache in the end. It will also make it easier to copy and paste your photo into templates and frames.
 All Trixie Scraps Designs products can be found in the following online stores:
Trixie Scraps Shop * My Memories * Ginger Scraps


