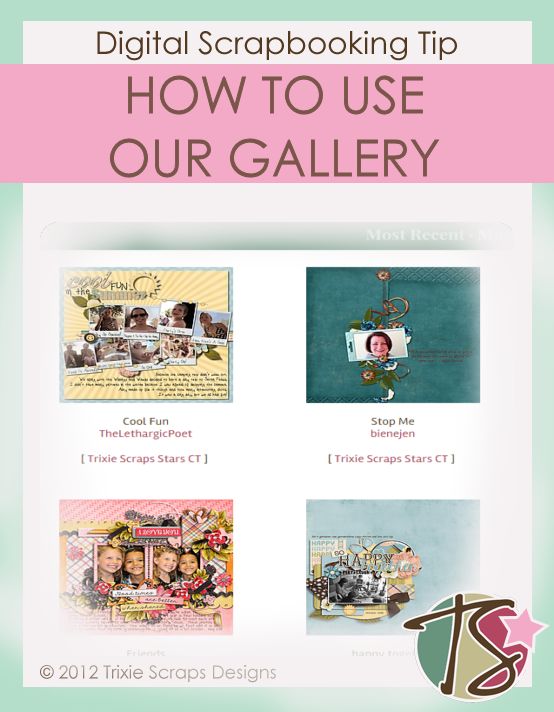
Welcome to another Monday on the Trixie Scraps blog. Today’s Master’s Monday is a guide or walk through on using our gallery. Most of you are probably experts when it comes to using the gallery, but for those of you who are beginners and might feel a wee bit overwhelmed – this guide is just for you.
Chapter One
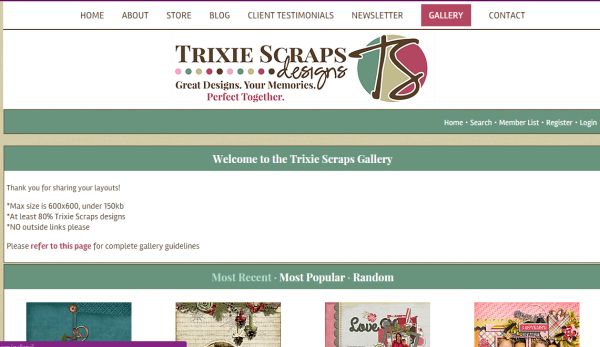
Let’s start with the beginning and register you for an account. Make your way to the gallery. Seeing as how you are already reading this post, you should see the link for the gallery at the top of your screen. Just click on the gallery link and don’t worry about any of the drop-downs. (For this walkthrough anyway, feel free to click through them any other time.)
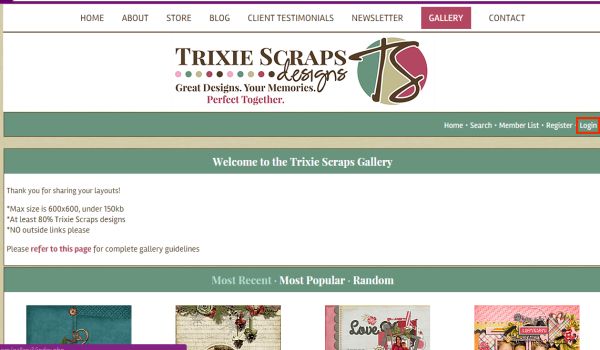
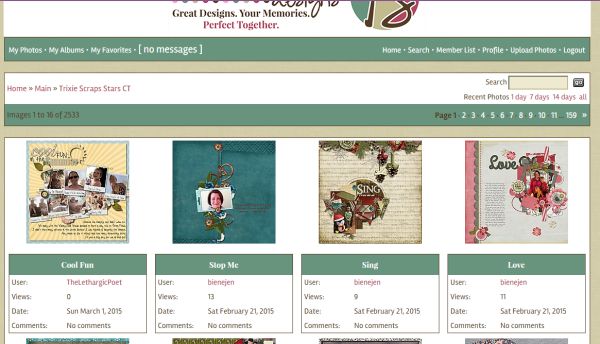
After clicking the gallery link, you will be taken to this screen. It is the home screen for the Trixie Scraps Gallery.
Because we are starting at bare basics, let’s get you registered. If you’re already registered – skip to Chapter Two.
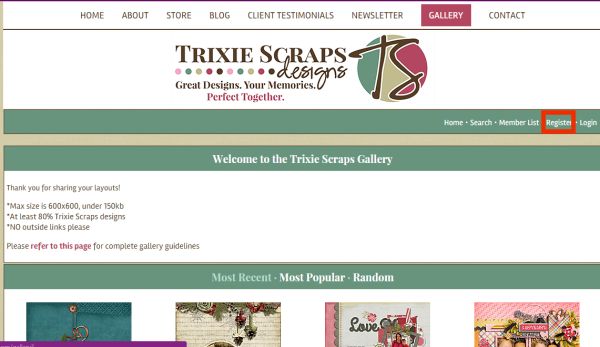
Click on the REGISTER link in the blue bar towards the top of your screen.
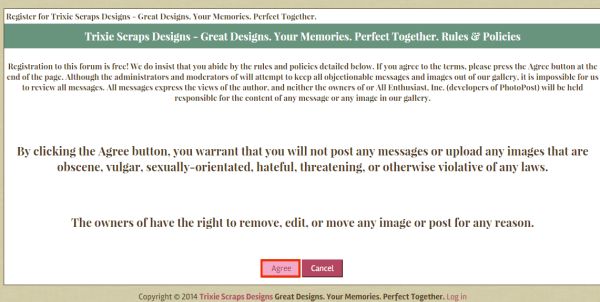
You will then be brought to this screen. We are a family-friendly group and want to keep our gallery family-friendly as well. If you can abide by these regulations, click on AGREE.
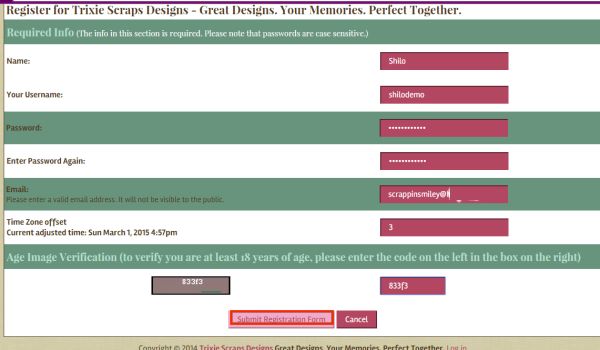
The next screen you’ll see is this:
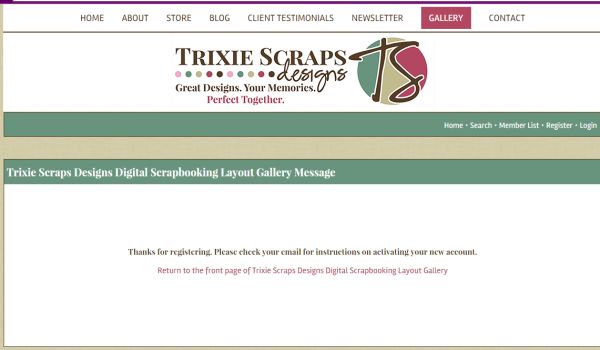
This is where you register. After you’ve filled in all the rectangles, click SUBMIT REGISTRATION FORM. You will then get a message like the following:
This lets you know that your registration was submitted and you will get an email with further instructions on activating your account. You are then ready for chapter 2.
Chapter Two
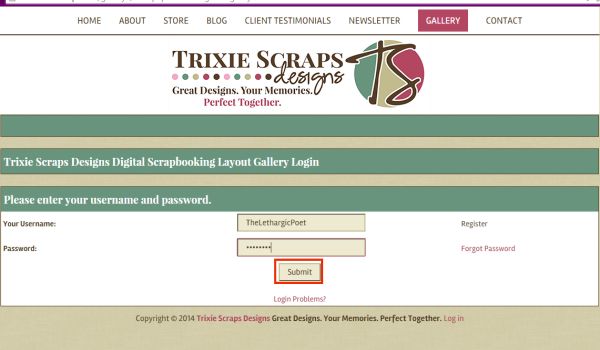
We are now ready to start uploading our awesome layouts to the gallery. We begin by logging in. The LOGIN button is also in the top blue bar. Click it.
This is where you’ll be prompted to enter your username and password. After doing so, click SUBMIT.
As long as you’ve entered your information correct, you will be taken to the gallery’s home screen. On the top blue bar you should have the option to UPLOAD PHOTOS. (There are other things pertaining to you like: messages and profile – you can look at those anytime. We’re just not showing you that with this walkthrough) Click on UPLOAD PHOTOS.
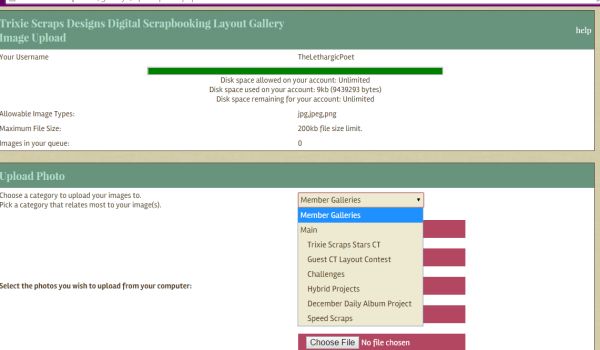
You will notice that there is a drop down menu where it asks you to choose a category. For most of your layouts you can just default to MEMBER GALLERIES. You have a chance later to more specifically place your layout.
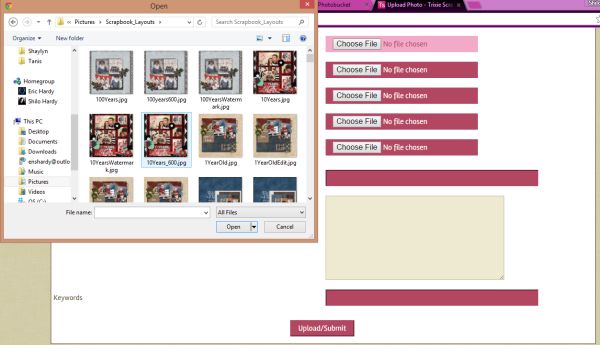
So let’s actually upload a layout. Click on CHOOSE FILE. This will bring up your folder window where you can browse to your layouts. Then click the layout you want to upload followed by OPEN.
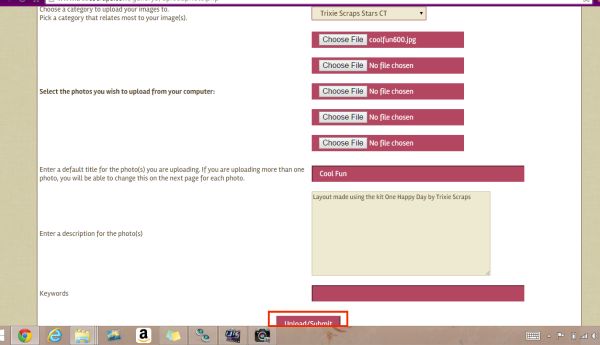
You can see in the following image that my layout has now been selected. I have also now entered the title I want for my layout as well as a description. You can describe your layout however you’d like, but you should always make sure to include the name of the kit and/or template you’ve used. You can also use keywords if you’d like. After your information is all entered, click UPLOAD/SUBMIT.
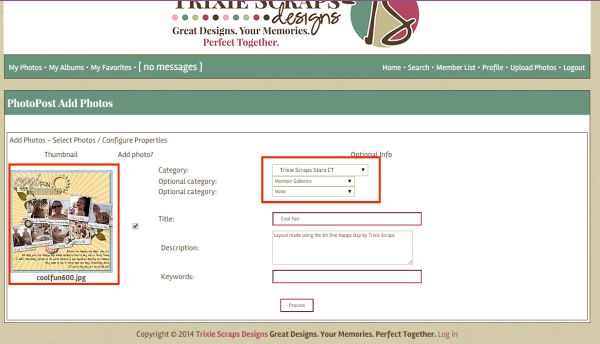
You will then see this screen:
This is where you can do all your last minute edits or more in-depth edits. You’ll see a thumbnail image of your layout to the left and in the right hand side is where you can choose to upload your layout to other galleries besides the Member Galleries. You can also make edits to the other information you want included with your layout. Click PROCESS when you’re done. You will see a quick screen that let’s you know your layout was uploaded.
You are then taken back to the gallery’s home screen and lo and behold, your beautiful layout is now on our gallery’s homepage.
Epilogue
We hope this helps you get to know our gallery better. We really enjoy seeing everyone’s layouts and our gallery has been pretty lonely as of late. So let’s all make each other a cyber promise and get our layouts using at least 80% Trixie Scraps product uploaded to the gallery! Remember, just by uploading your layouts you are able to win a free prize every couple weeks.
